How to Mix and Master at Home: A Practical 2026 Guide
Quick answer: Mixing balances and shapes the individual tracks in a song; mastering prepares the finished stereo mix for release. At home, the most reliable path is to organize the session, build a static balance, solve problems at the source, compare against references, leave clean headroom, and master with small, deliberate moves.
You do not need an expensive analog rack. You do need an honest monitoring setup, rested ears, and a repeatable process. This guide shows that process from raw multitrack session to final delivery files.
Mixing and mastering are different jobs
During mixing, you work with separate vocals, drums, bass, instruments and effects. You control their levels, stereo positions, tone, dynamics and depth so they function as one arrangement.
During mastering, you work from the completed stereo mix. The goals are translation, tonal and dynamic consistency, appropriate playback level, clean sequencing, and correct export files. Mastering is not a rescue operation for a weak balance. If the kick is too loud or the vocal disappears, return to the mix.
Prepare your room and monitoring
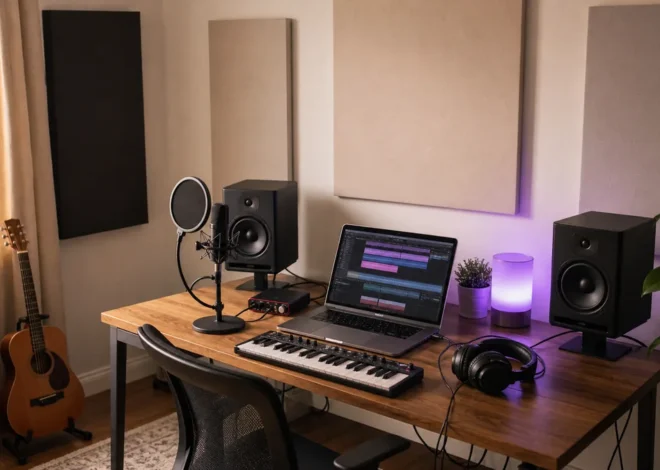
Use the best listening system you already own and learn it with well-produced music. Nearfield monitors should normally form an approximately equal-sided triangle with the listening position and be placed symmetrically in the room. Keep them away from corners when possible, and use broadband acoustic treatment at strong reflection points.
Headphones are valuable for low-end checks, edits and late-night work, but they present stereo width differently from speakers. Make final decisions across both if available. Our budget home-studio guide explains the practical setup.
Choose a comfortable monitoring level and turn it down regularly. Quiet listening exposes vocal and snare balance; brief louder checks can reveal harshness, but long loud sessions fatigue your ears and distort judgment.
Prepare the session before processing
- Save a new mix version and keep the original recordings untouched.
- Name, color and group related tracks.
- Remove obvious clicks, unwanted noises and empty regions with careful fades.
- Check timing and tuning only where they distract from the performance.
- Route tracks to useful buses such as drums, instruments, vocals and effects.
- Import one or two level-matched reference tracks in a similar style.
Bypass any reference track from the master processing path. Turn references down until they are similar in perceived loudness to your mix; otherwise the louder option will often seem better even when its balance is less useful.
Build a static mix first
Pull the faders down, then establish the song’s foundation using only level and pan. Start with the most important element—often the vocal, drums or a central instrument—and build around it. A strong static balance reduces the amount of corrective processing you need later.
Leave room on the stereo output. There is no magic mix-bus peak target, but the output must not clip. Healthy 24-bit recordings do not need to sit close to 0 dBFS, so avoid pushing every channel or bus unnecessarily hot.
Use EQ to create space, not to follow recipes
Equalization changes the level of frequency ranges. First decide what problem you hear, then choose the smallest move that solves it.
- Use a high-pass filter only when unwanted low-frequency energy is present; do not remove useful body automatically.
- Sweep narrow boosts briefly to locate a resonance, then test a modest cut.
- Use broad boosts for musical tone when the source genuinely needs more brightness, warmth or presence.
- Compare EQ at matched output level so gain does not influence the decision.
Arrangement and level often solve “frequency” conflicts more naturally than aggressive EQ. If two parts compete continuously, change their octave, timing, sound selection or automation before carving both apart.
Control dynamics with intention
A compressor reduces level when the signal crosses a threshold. Attack controls how quickly it reacts; release controls how quickly it recovers; ratio controls the strength of reduction. Use compression to achieve a defined goal: stabilize a vocal, shape a drum transient, add movement or gently connect a bus.
Set the threshold while listening in the full mix. Fast attack can soften transients; slower attack can preserve punch. A release that is too short may chatter or distort, while one that is too long can keep the signal pinned down. Match the processed and bypassed loudness before deciding whether it improved the track.
Automation is often more transparent than heavy compression. Ride vocal phrases, bass notes and effect sends so the musical balance remains intentional from section to section.
Create width and depth
Keep critical low-frequency and lead elements stable unless the arrangement calls for something else. Pan supporting parts to create separation, but check the mix in mono: phase cancellation can make wide sounds vanish or change tone.
Use short ambience, longer reverbs and delays on send channels so several tracks can share a coherent space. Filter effect returns when their low end or high-frequency buildup crowds the dry mix. Automating reverb and delay between sections is usually more effective than leaving one static amount everywhere.
Check the mix before mastering
- The lead remains clear at quiet volume.
- The bass and kick are distinct rather than simply loud.
- No channel, bus or stereo output clips.
- The mix still works in mono.
- Section changes feel intentional and automation is smooth.
- Reverbs and delays stop cleanly at the ending.
- The mix translates to headphones, small speakers and another familiar system.
Take a break, then export a clean stereo mix at the session’s native sample rate and bit depth. Avoid sample-rate conversion or dithering unless the delivery format requires it. Keep the final mix free of accidental clipping and leave any creative mix-bus processing in place if it is essential to the sound.
A practical home-mastering workflow
1. Start a separate mastering session
Import the stereo mix into a clean project. Add the final mix, a level-matched reference and meters for integrated loudness and true peak. Confirm that the file begins and ends cleanly.
2. Correct only broad tonal issues
Use small, broad EQ moves when the entire mix is consistently too dark, bright, thin or heavy. A narrow problem tied to one instrument is usually better repaired in the mix.
3. Control dynamics only if needed
Gentle full-band compression can shape movement, but it is optional. Multiband compression is not automatically required for mastering; use it only when a specific frequency range has a repeatable dynamic problem that cannot be fixed in the mix.
4. Manage stereo width carefully
Compare width against references and watch mono compatibility. Excessive widening can weaken the center and create phase problems. Low frequencies generally benefit from stability, but there is no universal crossover setting for every song.
5. Set final level with a true-peak limiter
Raise the limiter input gradually and listen for flattened transients, pumping, vocal harshness and low-end distortion. Stop when the musical cost becomes noticeable. Loudness is a creative and genre-dependent choice, not a score to maximize.
Understand streaming loudness correctly
Spotify currently normalizes standard playback to -14 LUFS and recommends masters at or below -1 dB true peak; for masters louder than -14 LUFS, it recommends staying below -2 dB true peak to reduce encoding distortion. These are Spotify-specific playback and mastering recommendations—not a universal law that every master must measure exactly -14 LUFS.
Other services, devices and listener settings behave differently, and platforms can change their processing. Choose dynamics that suit the music, check current delivery specifications, and keep a high-quality archive master. See Spotify’s current loudness-normalization guidance.
Export files without losing quality
- Archive/distribution master: export a lossless WAV or FLAC at the required sample rate and bit depth.
- MP3 or AAC copy: create it from the lossless master, not from another compressed file.
- Dither: apply it once when reducing bit depth, normally as the final process.
- Metadata: verify titles, artist information and version names before delivery.
- Quality control: listen to the exported file from beginning to end and test an encoded version.
Apple provides auditioning and clipping tools for checking how a master behaves after AAC encoding through its Apple Digital Masters resources.
Common mistakes to avoid
Mixing only in solo
A sound can be impressive alone and wrong for the arrangement. Make final decisions in context.
Using presets as instructions
Presets are starting points. Thresholds, frequencies and timing must respond to the actual recording.
Mastering while the mix is still changing
Print a deliberate mix version, take a break, and master separately. Return to the mix when a problem belongs to an individual element.
Chasing loudness before balance
A limiter cannot repair masking, harshness or poor arrangement. Finish the mix first and compare references at matched loudness.
Trusting one playback system
Translation matters more than perfection on one pair of speakers. Check several familiar systems and take notes before revising.
Frequently asked questions
Can I mix and master with stock plugins?
Yes. A capable DAW’s EQ, compressor, saturation, delay, reverb, limiter and meters can complete a professional workflow. Better decisions matter more than collecting plugins. Explore our verified free-plugin guide if your DAW lacks a specific tool.
Should I master my own music?
You can, especially for demos and independent releases. An experienced mastering engineer adds a trained second perspective and a controlled monitoring environment, which is valuable for important releases.
How much headroom should I leave for mastering?
There is no mandatory peak number. Deliver a clean, unclipped mix without unnecessary limiting. If an engineer supplies specifications, follow them.
Should I remove my mix-bus compressor?
Keep it if you mixed through it and it defines the sound. Also provide an alternate version if the mastering engineer requests one. Remove accidental loudness-only limiting when it is not part of the creative balance.
Editorial disclosure: CreoStack did not receive payment from the companies or services mentioned in this guide. Platform specifications can change; verify current requirements with the destination service before delivery.